Doors, windows and exits
Add doors and windows to walls, choose a door's type and swing, size and move openings, and mark a door as an exit.
Updated · View as Markdown
Doors and windows sit in walls. Add one from the tool bar or from a wall's card, then set its type, size and place on the wall from its own card.
Add a door or a window
- Press Doors and windows in the tool bar and choose Doors or Windows.
- Click the wall you want. The card above the tool bar reads “Add a door to this wall.”
- Press Add door (or Add window). It goes in the middle of the wall and is selected.
Quicker: select a wall and press Add door or Add window on its card.
| Opening | Starts as | Needs |
|---|---|---|
| Door | 900 mm wide and 2,100 mm high | A wall at least 1.3 m long |
| Window | 1,200 × 1,200 mm, with its sill 900 mm above the floor | A wall at least 1.6 m long and 2.1 m high |
If the wall is too short or too low, the message says so and nothing is added.
Choose the door type
Select a door to open its card. Under Door type:
- Door operation: Swing / sliding or Overhead door.
- For a swing or sliding door, pick Single left, Single right, Double door or Sliding door, then the Door swing direction: Open inward or Open outward.
- For an overhead door, pick the Overhead door style (Sectional, Roll-up or Dock) and the Overhead door position (Closed or Raised).
Each choice changes the door at once, as one undo step.
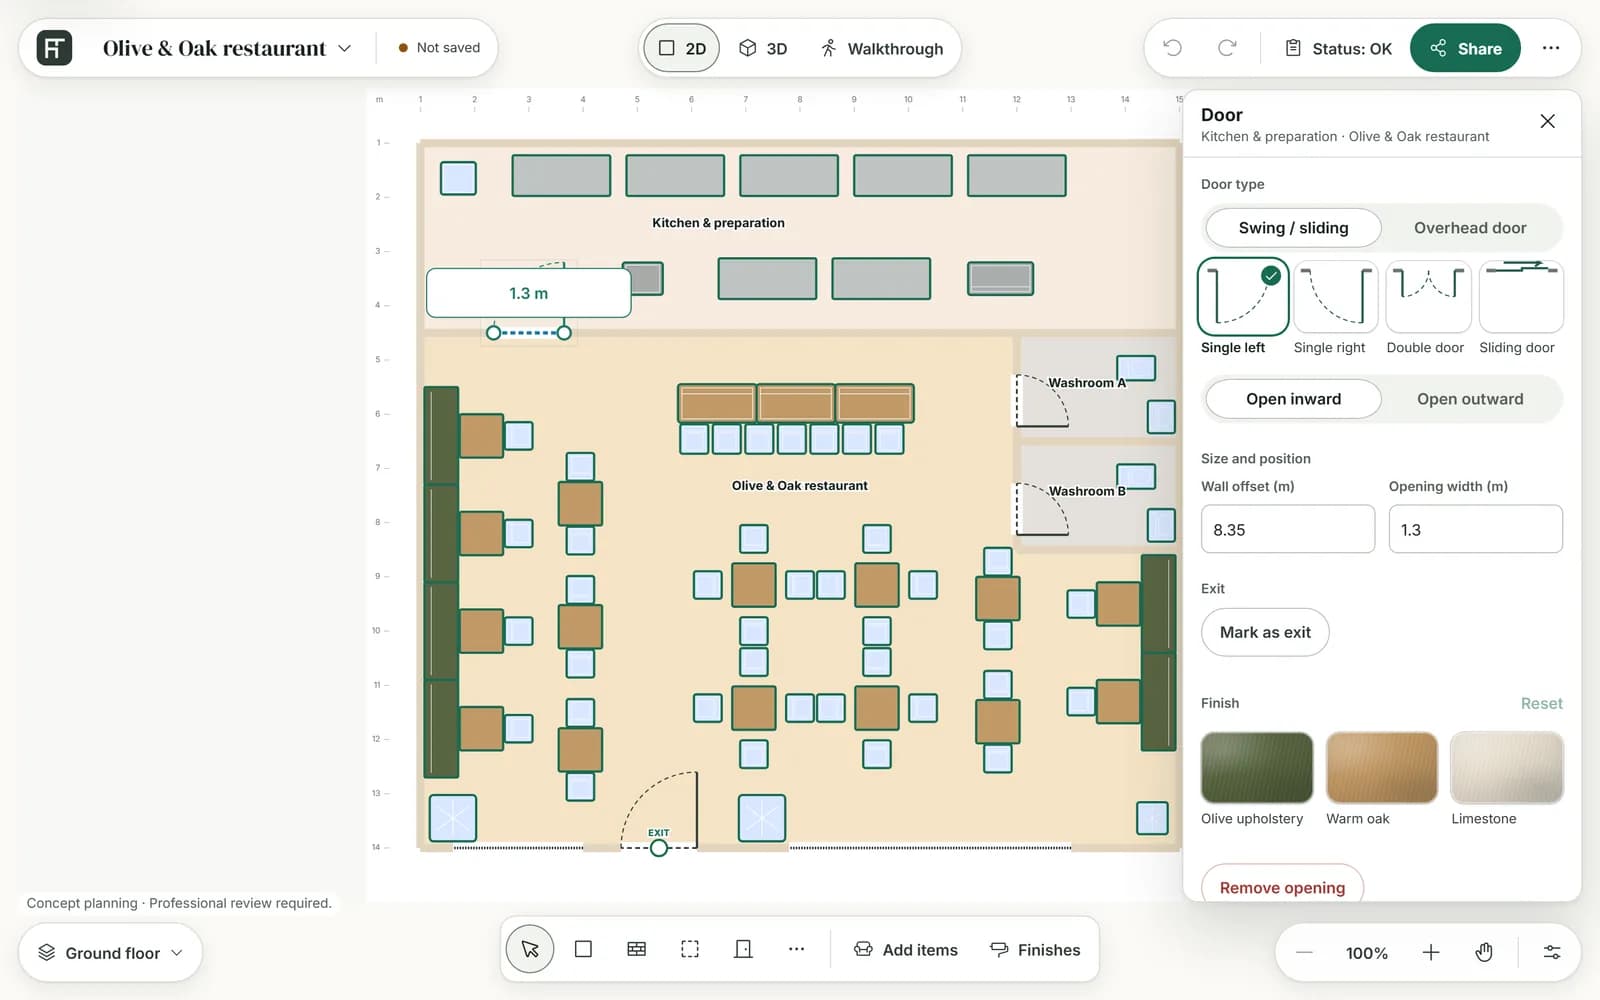
Size and move a door or window
- Drag a door or window along its wall to move it.
- Drag either end handle to make it wider or narrower, or focus a handle and use the arrow keys.
- Or type exact values under Size and position: Wall offset, the distance from the wall's start, and Opening width. Windows and overhead doors also have Opening height, and windows Sill height.
A door or window has to fit inside its wall, and two openings in the same wall can't overlap: “Openings cannot overlap. Leave space between the door and window.”
Keep doorways clear
The plan check keeps an approach clear on both sides of every door. An item, column or stair standing in it is a blocking issue: “Door opening and both approach areas must remain traversable.” Where the depth kept clear is the planner's own default, Space around on an item's card says so: it is not a published standard. A new room can't be placed in front of a doorway either.
Every room also needs a route through clear doorways from a door in an outside wall. A room without one is flagged as blocking, and so is a plan with no door to the outside. See Plan check and clearances.
Mark a door as an exit
- Select the door.
- Under Exit, press Mark as exit.
The door gets an EXIT marker on the 2D plan and the label “Exit”, which you can change in Exit label. The plan check then looks for a route from an entrance to each exit in an outside wall. Windows can't be marked as exits.
To take the marking off, press Remove exit designation, then Remove designation in the review. Only the marking goes; the door stays.
Warning: An exit marker is a planning note, not an egress or fire design. Have a qualified professional plan and review exits and escape routes.
Remove a door or window
Press Remove opening on its card, or Delete. A review shows what changes: press Remove opening again to confirm, or Cancel. A door marked as an exit needs its exit marking removed first.