Paint walls and change floors
Change paint, wallpaper, prints and floors with Materials in the 3D view, on a surface's card in 2D, or from the Finishes list.
Updated · View as Markdown
Every wall face, room floor, ceiling and zone in your plan can have its own finish. There are three places to change one:
- Materials in the 3D view: pick a finish, then click a wall or a floor, or drag it on. The quickest way to try a look.
- The Finish section of a surface's card in 2D: every option, including your own colours, sheen and print sizes.
- The Finishes list in 2D: every room's walls and floor in one list, to find a surface and open its card.
Each change is one step that Undo (or Ctrl + Z) takes back. Finishes are saved with the plan and show on its shared link.
Paint in 3D with Materials
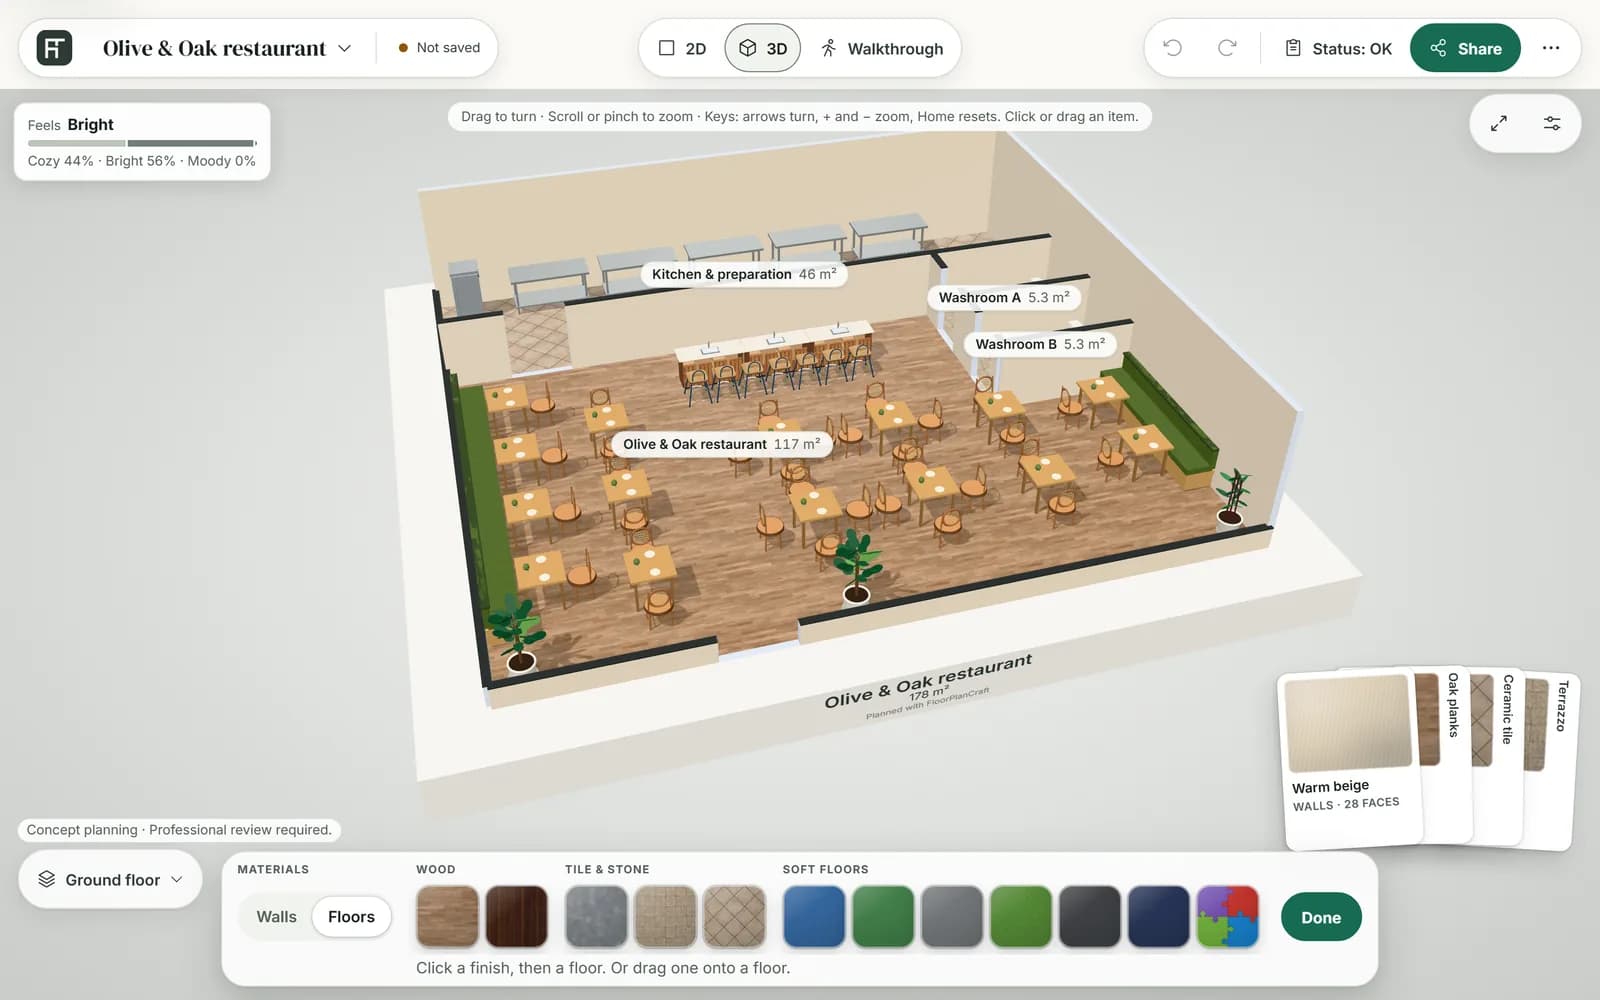
- Switch to 3D in the top bar, then press Materials in the bar along the bottom of the view.
- Choose Walls or Floors at the left of the palette.
- Click a finish. The line under the tiles says it is ready, for example “Soft sage is ready. Click a wall, or drag it on.”
- Point at a wall or a floor to preview the finish on it, then click to apply it. You can also drag a tile straight onto a surface.
- For a wall, choose how far the finish goes: This wall, Whole room or All outside walls.
- Press Done, or Esc, to close the palette.
| Choice | What it paints |
|---|---|
| This wall | Only the wall face you clicked. |
| Whole room | Every inside wall of the room that face belongs to. |
| All outside walls | Every outside face of the building on this floor. |
A choice that would change nothing is greyed out. The result shows under the tiles, such as “4 walls in Kitchen are now Soft sage”, with Undo beside it.
| Tab | Group | Finishes |
|---|---|---|
| Walls | Paint | Warm ivory, Soft sage, Clay, Sky, Honey, Chalk |
| Walls | Wallpaper | Botanical, Linen stripe, Playful confetti |
| Walls | Prints | Little Grove, Warm sunrise, Quiet mountains |
| Floors | Wood | Oak planks, Dark wood |
| Floors | Tile & stone | Polished concrete, Terrazzo, Ceramic tile |
| Floors | Soft floors | Rubber tiles in blue, green or grey, Artificial turf, Carpet in charcoal or navy, Interlocking mats |
- Paint from the palette is matte. For a satin sheen or a colour of your own, use the wall's card in 2D.
- A print is sized to fit the wall it lands on. Change its size and position on the wall's card.
- Wall finishes go on walls and floor finishes on floors. Drop one on the wrong kind of surface and the palette says “Drop wall samples on a wall” or “Drop floor samples on a floor”.
- If a theme preview is on, painting turns it off so you see the real finish, and the result ends with “Theme preview off.”
- Materials is greyed out while the plan's structure is hidden. Turn on Show structure in View options in 2D.
Tip: Esc works one step at a time: it ends a drag, then closes the wall choices, then puts the picked finish down, then closes the palette. With a tile focused, the arrow keys move along the row.
Change a finish on its card
In 2D, click a wall, a room's floor or a zone to open its card. Every choice in its Finish section applies at once; there is nothing to confirm.
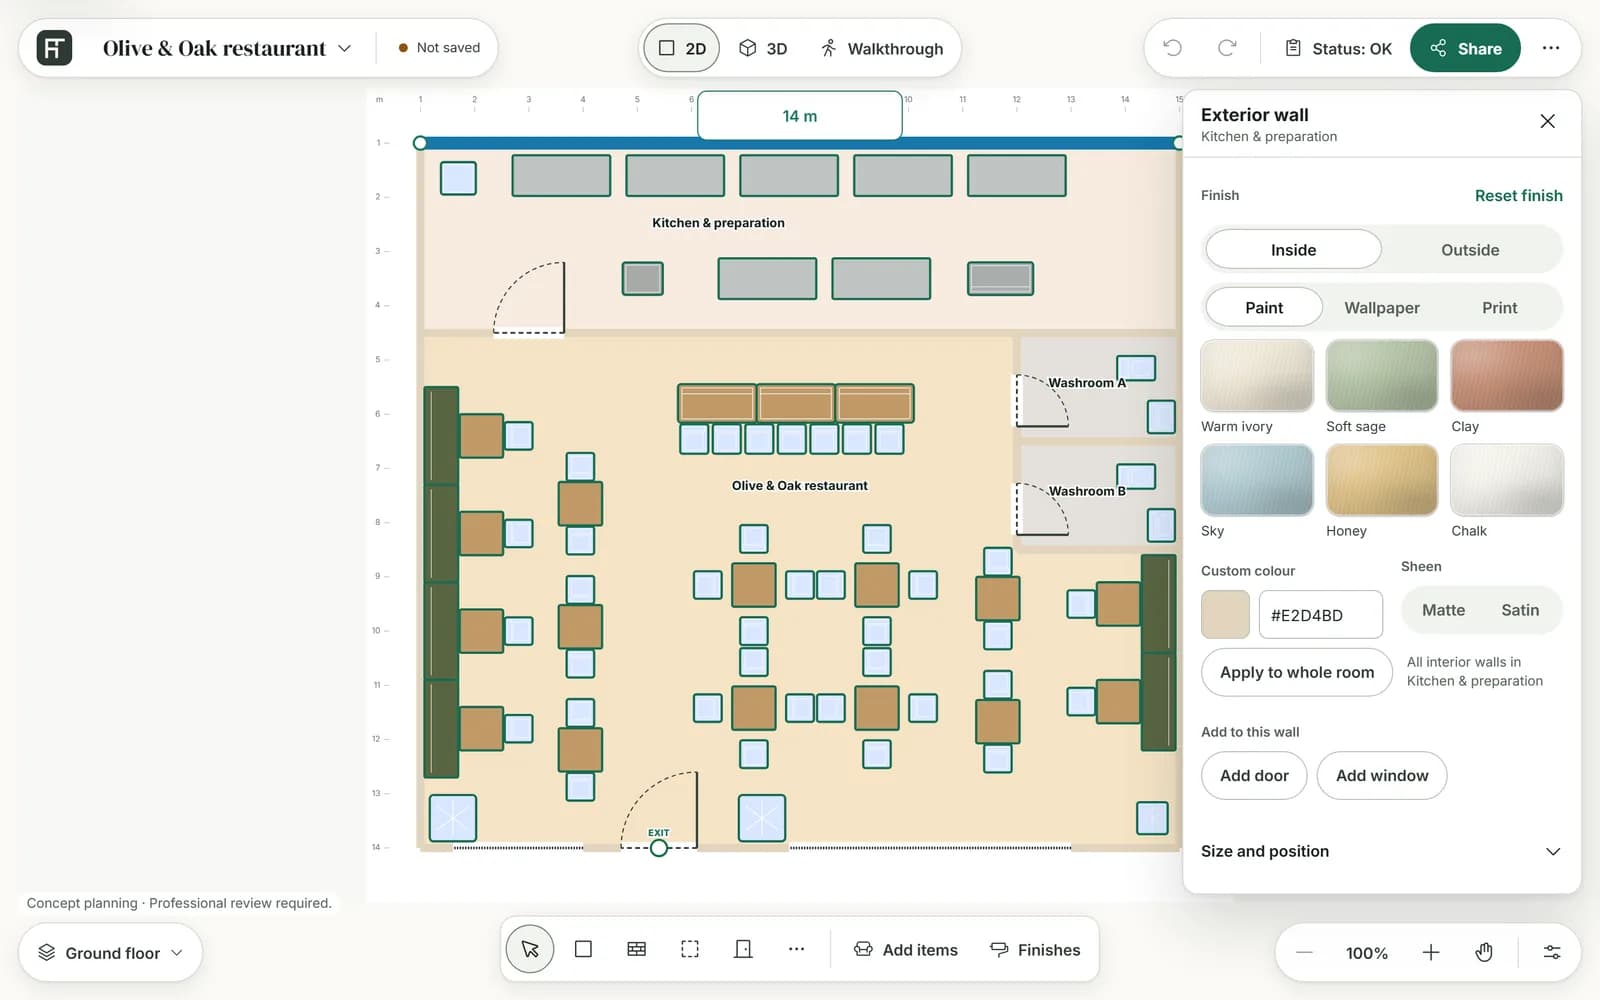
On a wall's card:
- Wall face picks the side you are changing: Inside or Outside on an outer wall, Side A or Side B on a wall between two rooms or a free-standing wall.
- Finish type switches between Paint, Wallpaper and Print, each with its own tiles.
- Paint adds Custom colour, with a colour picker and a Hex colour field, and Sheen: Matte or Satin.
- Wallpaper adds Pattern size. A print adds Width, Height, From left and From floor. A size applies when you press Enter or leave the field.
- Apply to whole room copies this face's finish to every inside wall of the room. On a face with no finish of its own it reads Reset whole room and puts the room's walls back to the default.
- Reset finish puts this face back to the default.
On a room's or a zone's card:
- On a room, Space surface switches between Floor and Ceiling.
- For a floor or a zone, Finish type switches between Photo floors and Colours. Six photo floors show first; the rest are under More floors.
- Colours are the colour finishes of your plan's catalog. A ceiling offers these only.
- Reset puts the surface back to the default.
Items, and the sides of a door or window opening, have a Finish section with the catalog's colours too.
Find a surface in the Finishes list
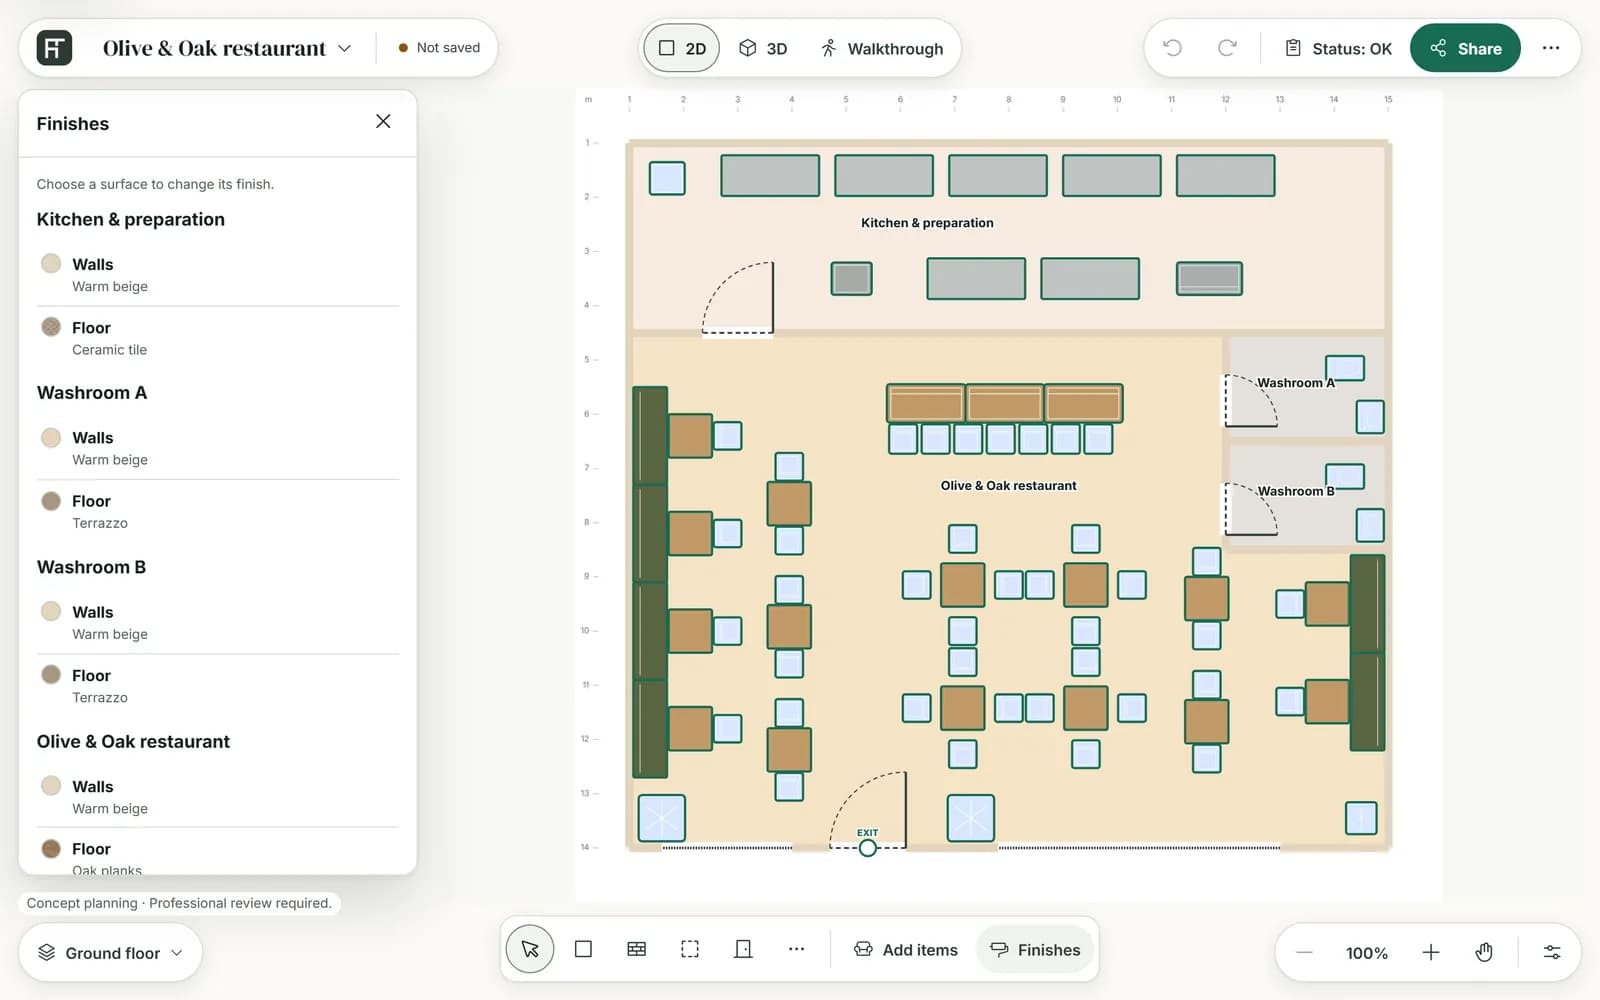
- In 2D, press Finishes in the tool bar at the bottom.
- Find the room. Each room has a Walls row, a Floor row and a row for each zone in it, and every row names its finish now. Outside walls lists the outside of the building. On a plan with several floors, rooms are grouped by floor.
- Click a row. The planner selects that surface and opens its card. A Walls row opens one of the room's walls on its inside face; Apply to whole room there changes them all.
- To try finishes on the model instead, press Paint in 3D. The 3D view opens with Materials.
Paint while you walk
In the walkthrough, Paint walls pauses the walk and opens Materials. See Walk through your plan.
Note: A finish's name describes how it looks. It does not mean a floor or wall covering is suitable or rated for any use, such as fall protection under play equipment.