Floors and stairs
Add floors to a building, set each floor's name, elevation and ceiling height, and connect floors with stairs you can walk.
Updated · View as Markdown
A plan can have several floors, and you draw each one on its own in 2D. Stairs connect them, and the walkthrough can climb them.
Switch floors
The floor chip at the bottom left shows the floor you are on. Open it and pick another floor. In the 3D view of a plan with more than one floor, the chip also offers Whole building, a plain 3D view of every floor at once. See Look at your plan in 3D.
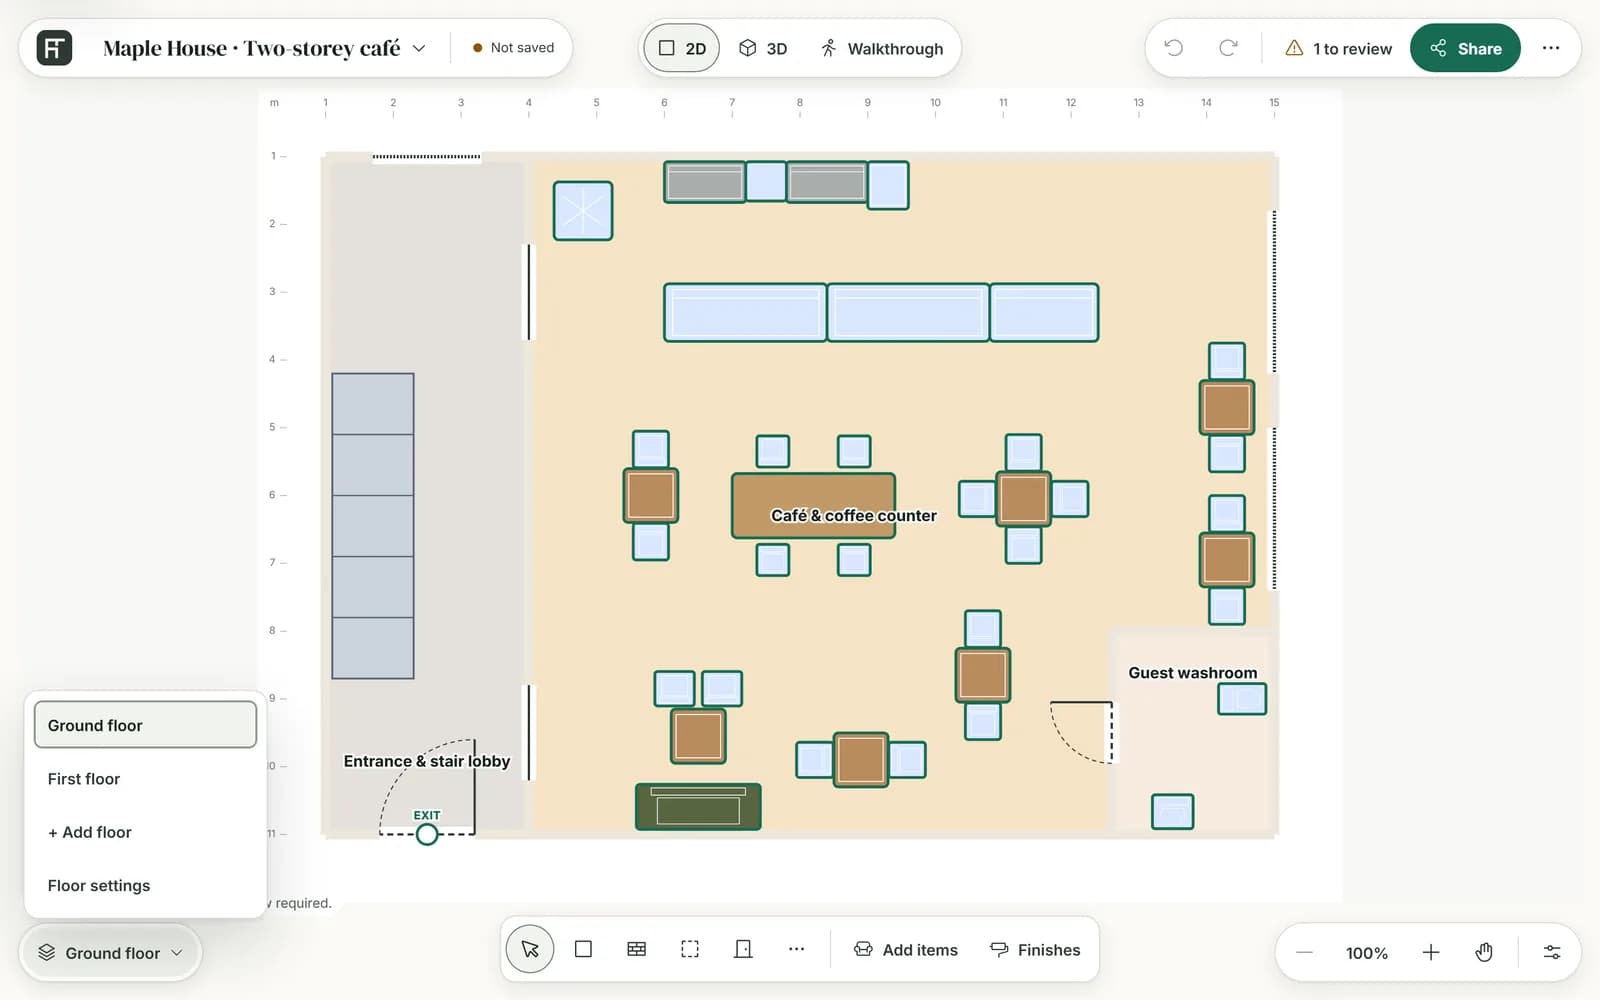
Add a floor
- Open the floor chip and choose + Add floor.
- The new floor goes above the top floor and Add room starts, so you can place its first room.
A building can have up to 32 floors. Undo removes a new floor.
To start from a copy instead, open Floor settings on the floor you want to copy and press Duplicate this floor. The copy gets the rooms, furniture and finishes, with their walls, doors, windows, zones and columns. Stairs are not copied: add them separately.
Floor settings
Open Floor settings from the floor chip or from More tools (⋯). It shows the floor you are on:
| Field | What it sets |
|---|---|
| Floor name | The name the floor chip and the cards use. |
| Floor elevation (m) | How high the floor's level is. Each floor needs a different elevation. |
| Floor ceiling height (m) | The ceiling height. Walls that follow the ceiling change with it. |
| Duplicate this floor | Adds a copy of this floor. |
Press Apply to make the change, as one undo step. The ceiling has to stay above the top of every door and window in the walls that follow it.
Place a stair
A stair needs another floor to lead to, at a different elevation. Until there is one, Place stair is greyed out and More tools offers Set up stair destination instead.
- Go to the floor the stair starts on.
- Open More tools (⋯) and choose Place stair. The card names the floor it leads to: the nearest other floor.
- Click inside the room where the stair goes.
When the stair fits, it goes inside the room you clicked, clear of the walls. Its length grows with the height between the floors and is never shortened to fit, so if it doesn't fit, the message says so and suggests turning it or using a larger room.
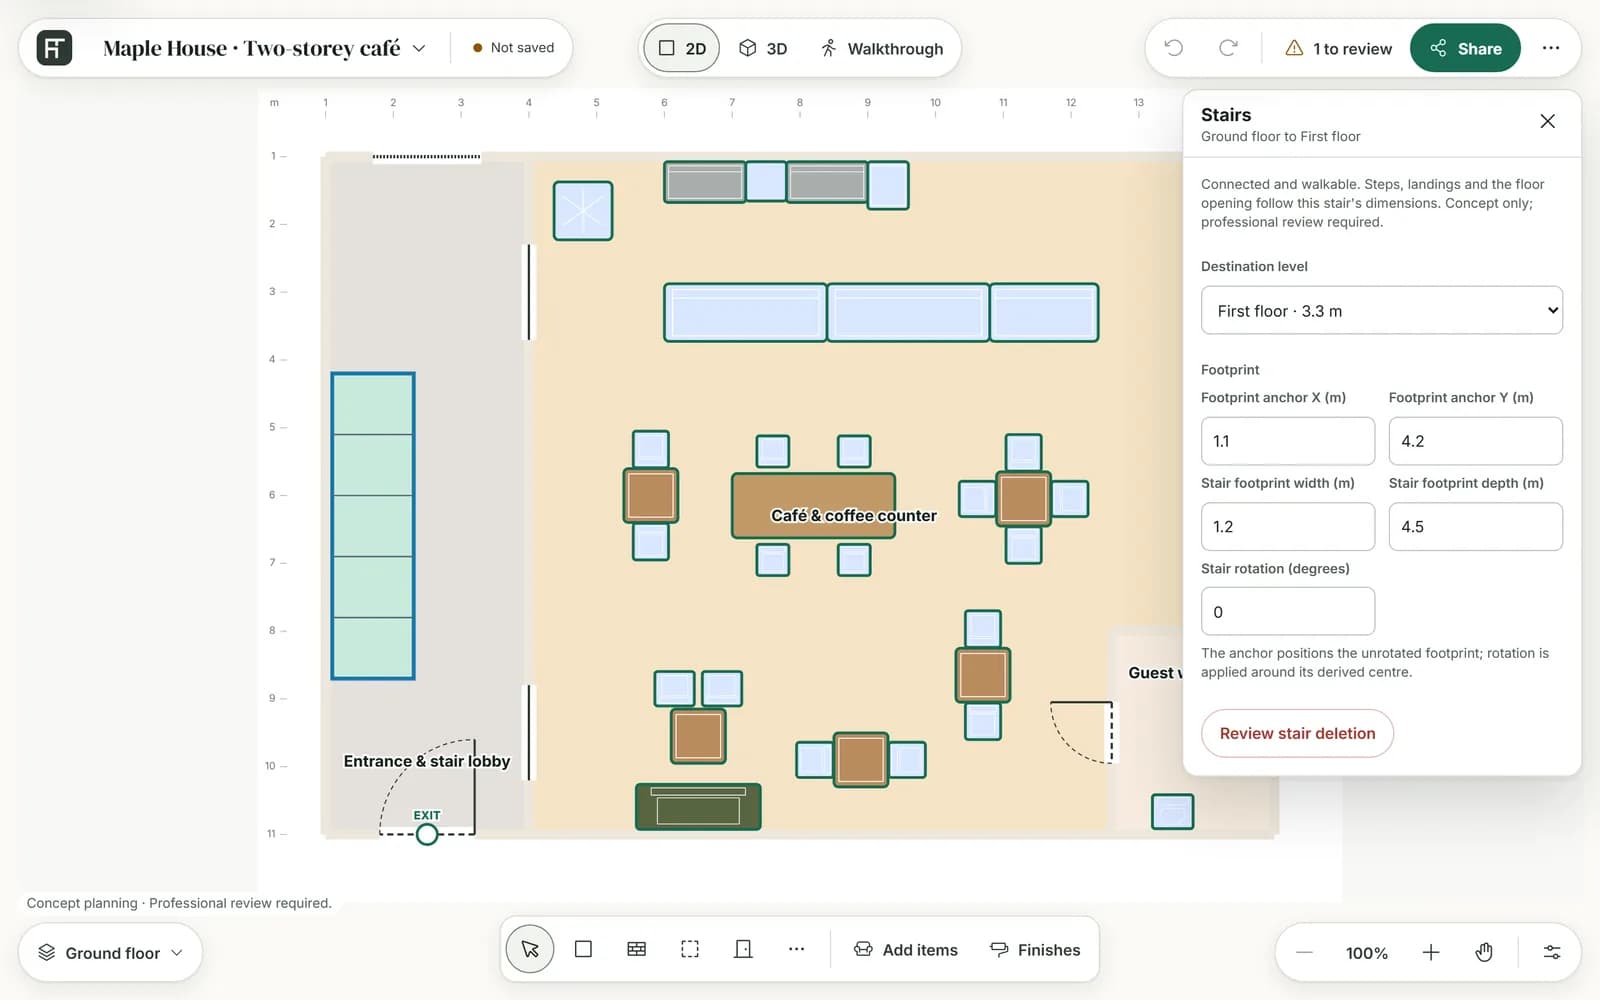
The stairs card
The card's first line says whether the stair can be walked: “Connected and walkable …” or “Not walkable yet …”. To make a stair walkable, give both floors a room where it lands, keep both landings clear and lined up, and give it enough width and length for the height between the floors.
| Part | What it does |
|---|---|
| Destination level | The floor the stair leads to. |
| Footprint | Footprint anchor X and Footprint anchor Y, Stair footprint width and Stair footprint depth, and Stair rotation (degrees). |
| Review stair deletion | Opens a review; Delete stair removes the stair. |
The steps, the landings and the opening in the floor follow the stair's size. In the walkthrough, walk onto a connected stair to change floors: see Walk through your plan.
Note: The stair models in Add items are pictures only: they don't connect floors. Use Place stair for a stair you can walk.
Warning: Stairs in a plan are concept geometry, as the card says: “Concept only; professional review required.” Have a qualified professional design and review any real stair.
Destination levels
Floor settings has an Advanced stair destinations section, which Set up stair destination opens for you. Add destination level… asks for a Level name, an Elevation (m) and a Ceiling height (m), then Add level adds that floor. It shows in the floor chip like any other floor, ready for a stair to lead to.
Each level in the list has two buttons, Edit and Review removal for, each followed by the level's name. They work only while that floor is still empty; Remove level in the review takes the level away.