Columns, zones, venue size and the view
Place columns, mark zones, resize the whole venue, and control the 2D view: zoom, pan, the grid, snapping and what is shown.
Updated · View as Markdown
Besides rooms and walls, the 2D plan has tools for columns and zones, a way to resize the building's outside walls, and controls for the view itself.
Place a column
- Open More tools (⋯) and choose Place column.
- Click the plan where the column stands.
Select the column to change it on its card: Column shape (Rectangle or Circle), Column height, Column X position and Column Y position, and Column width and Column depth, or Column diameter for a round one. To remove it, press Review column deletion, then Delete column.
The plan check flags an item or a stair that overlaps a column, and a column in a door's approach, as blocking.
Mark a zone
A zone marks part of a floor, such as a play area, a seating area or a waiting area, with its own name and floor finish.
- Press Draw zone in the tool bar.
- Drag a rectangle on the plan, or click two opposite corners.
The new zone is named Zone and a number. On its card you can change its Zone name and Finish.
To change its shape, press Edit boundary. Each corner has its own fields, such as Vertex 1 X and Vertex 1 Y, and buttons such as Insert after vertex 1 and Remove vertex 1; a zone keeps at least three corners. Press Apply boundary to use the new shape, or Cancel.
To remove a zone, press Review zone removal, then Remove zone.
Resize the venue
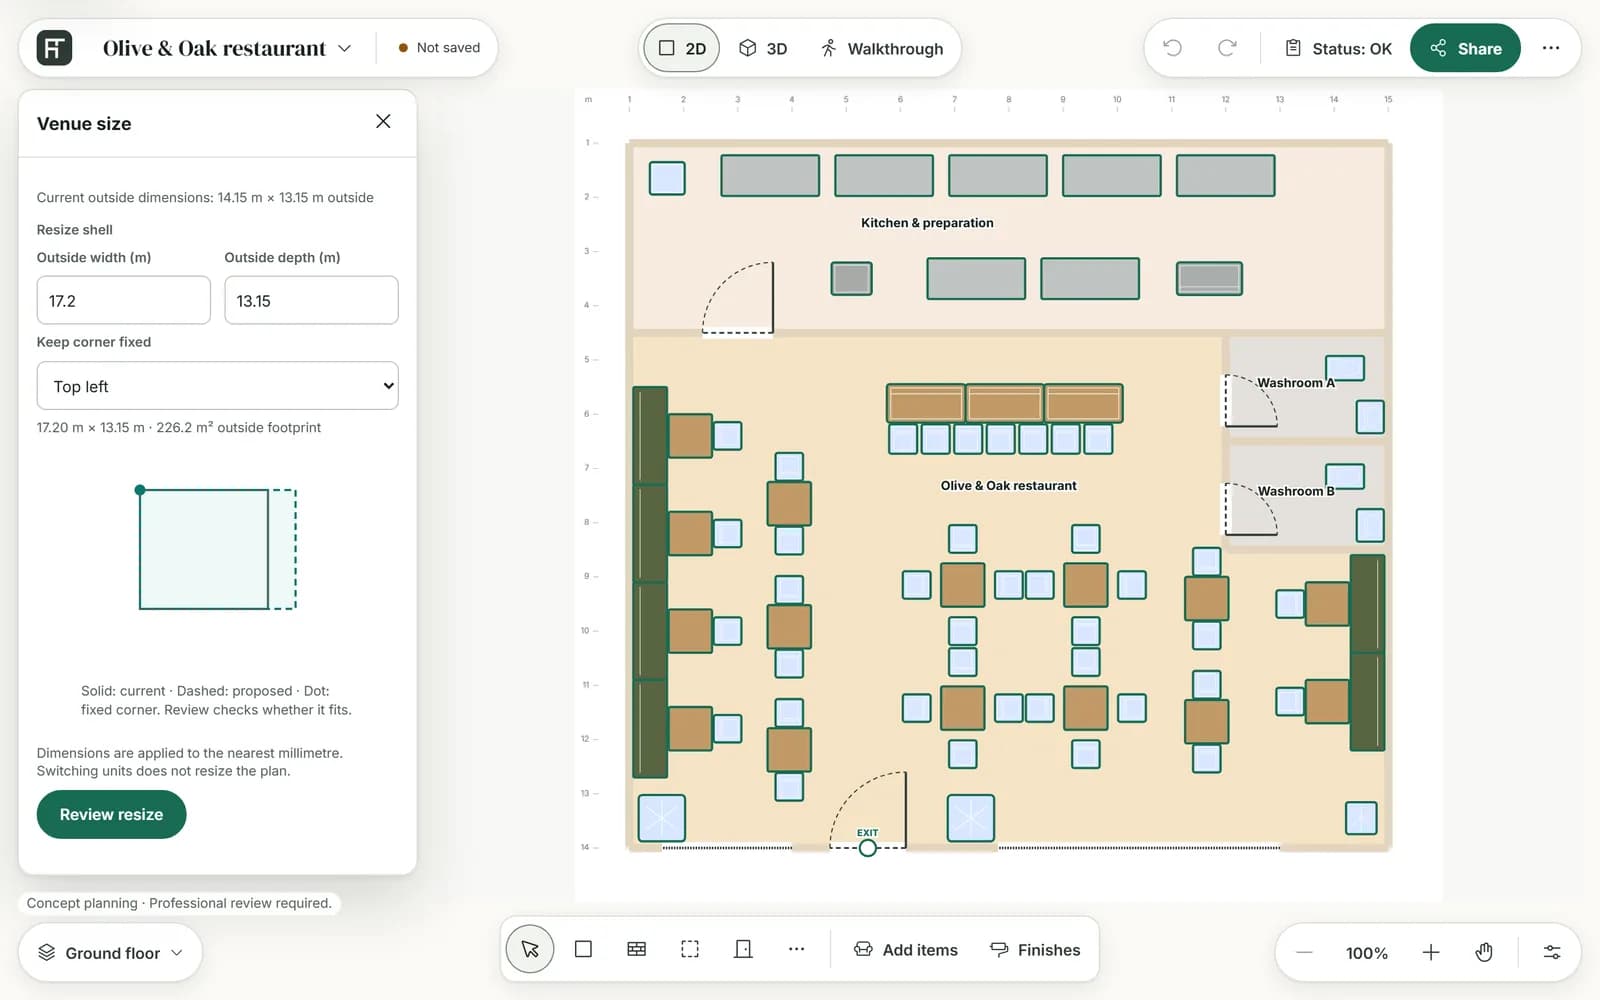
Venue size changes the outside size of the building on the floor you are on, while one corner stays where it is.
- Open More tools (⋯) and choose Venue size. The drawer shows the Current outside dimensions.
- Under Resize shell, type the Outside width (m) and Outside depth (m), and choose the corner that stays put in Keep corner fixed: Top left, Top right, Bottom left or Bottom right.
- Check the diagram: solid is the current outline, dashed is the new one, and the dot marks the fixed corner.
- Press Review resize. The review lists the walls, doors, windows and rooms that change. Press Apply resize, or Cancel.
Items, zones, columns and stairs stay where they are. If the new size won't work, for example because something would end up outside the walls, the message says why and nothing changes.
Note: Venue size works when the floor's outside walls form one rectangle with an even thickness on each side. Otherwise the drawer explains why it can't resize.
Zoom and pan
| Control | What it does |
|---|---|
| Zoom in and Zoom out | Zoom between 100% and 400%, a quarter at a time. |
| The zoom level, such as 100% | Reset view: back to the whole plan at 100%. In a narrow window it shows an icon instead. |
| Pan view | While it is on, drag the plan to move it around, or press the arrow keys with the plan focused. Turn it off to edit again. |
| Ctrl + mouse wheel | Zooms in or out at the pointer. |
View options
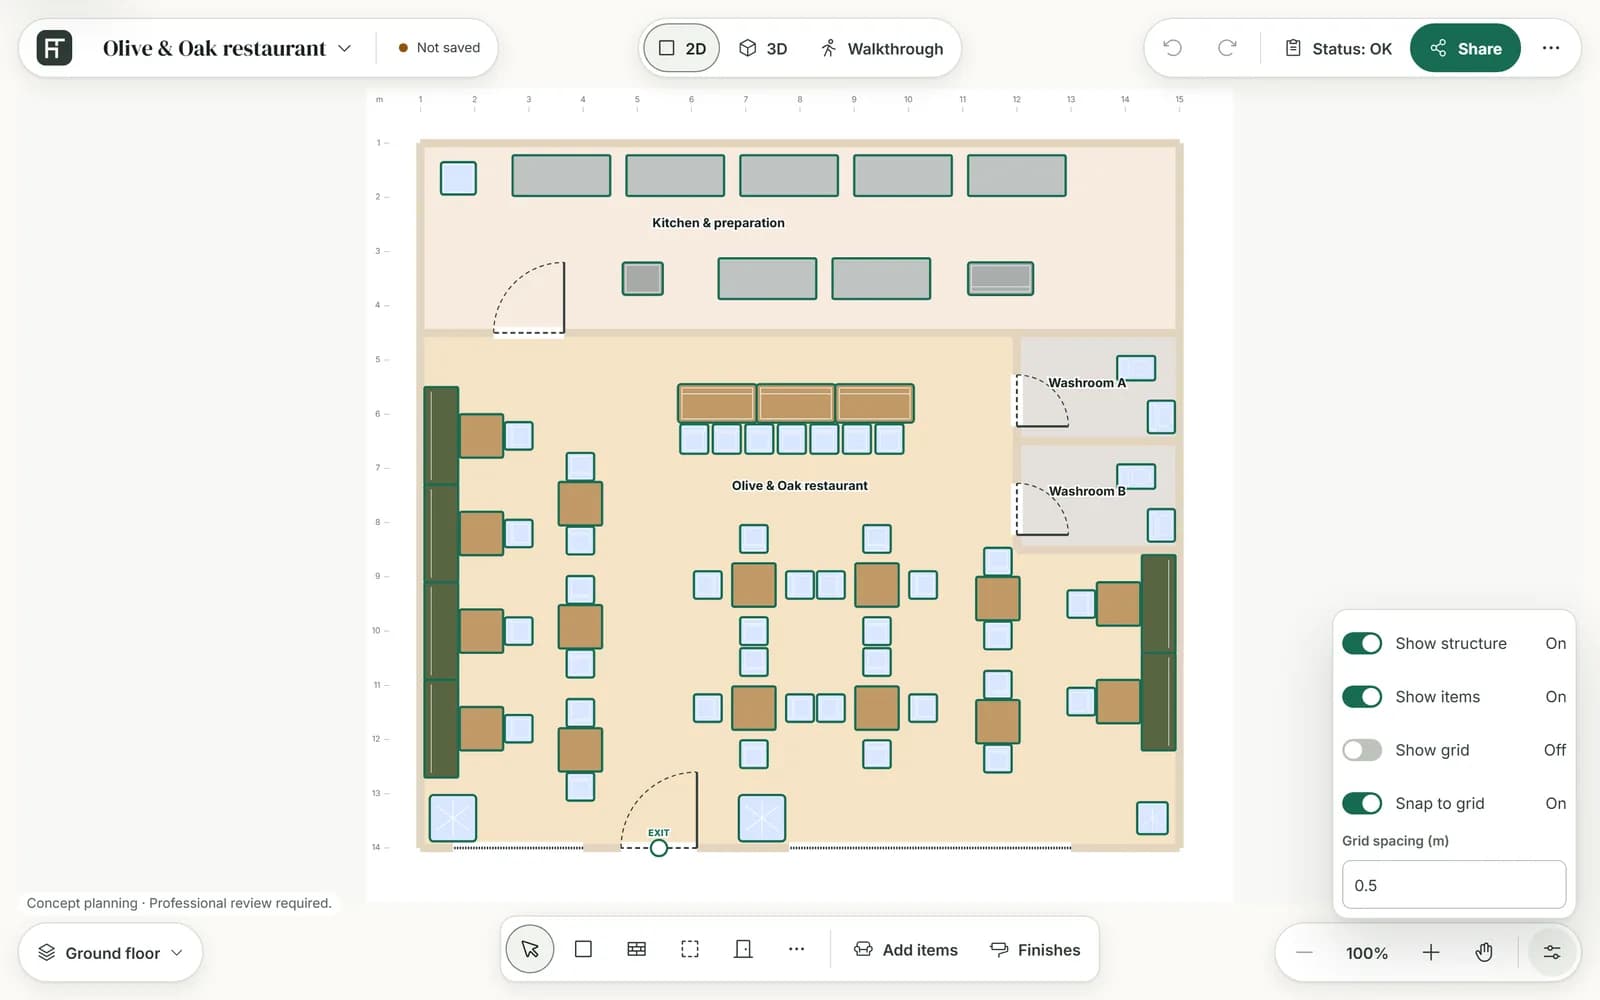
View options, at the end of the zoom controls, holds:
| Option | What it does |
|---|---|
| Show structure | Shows or hides everything except the items: walls, rooms, doors, windows, zones, columns and stairs. While it is off, the drawing tools and painting are unavailable. |
| Show items | Shows or hides the items. While it is off, you can't place items. |
| Show grid | Shows or hides the grid. |
| Snap to grid | Rooms, walls, items and handles snap to the grid as you place and move them. |
| Grid spacing | The size of a grid step, in the unit you use. |
These settings belong to the plan: they are saved with it, and Undo reverses them. The 3D view has its own view options for walls and room labels; see Look at your plan in 3D.
Metres or feet
Open More (⋯) and choose Metres or Feet under Measurement units. Every field, label and size follows, and this browser remembers the choice. Switching units doesn't resize anything.